> ## Documentation Index
> Fetch the complete documentation index at: https://docs.contraforce.com/llms.txt
> Use this file to discover all available pages before exploring further.
# User Management
> Add users to ContraForce, assign roles, and control access permissions across your organization and workspaces.
ContraForce provides flexible user management with role-based access control. Add users from your Entra ID directory, assign organizational and workspace roles, and control exactly what each team member can access.
## **Recommended Default Groups**
Setting up default groups during initial configuration saves time and ensures consistent access patterns.
**Suggested Partner Groups**
| Group Name | Description | Suggested Workspace Role |
| :-------------------- | :------------------------------------------ | :--------------------------- |
| SOC Tier 1 | Front-line analysts handling initial triage | Incident Analyst |
| SOC Tier 2 | Senior analysts with response capabilities | Incident Responder |
| SOC Managers | Team leads overseeing operations | Admin |
| Integration Engineers | Technical staff managing connectors | Data Source Admin |
| Account Managers | Customer relationship managers | Incident Analyst (read-only) |
ContraForce integrates with Microsoft Entra ID (formerly Azure AD) to pull user identities. Users must exist in Entra ID before they can be added to ContraForce.
## User Management Overview
Control who can manage users, groups, and workspace settings across your organization
Define what users can do within specific customer workspaces
***
## User Roles at a Glance
ContraForce uses a two-tier role system: **Organizational Roles** control administrative access, while **Workspace Roles** control operational access.
### Workspace Roles Quick Reference
| Role | View Incidents | Run Gamebooks | Manage Endpoints | Manage Data Connectors | Manage Users |
| ---------------------- | :------------: | :-----------: | :--------------: | :--------------------: | :----------: |
| **Admin** | ✓ | ✓ | ✓ | ✓ | ✓ |
| **Incident Responder** | ✓ | ✓ | ✓ | — | — |
| **Incident Analyst** | ✓ | — | — | — | — |
| **Data Source Admin** | ✓ | — | — | ✓ | — |
View detailed permissions for all organizational and workspace roles
***
## When to Add Users
Adding users is **not** part of module onboarding. First, sign in at [portal.contraforce.com](https://portal.contraforce.com), grant the core ContraForce app consents, and deploy your modules. Once your organization is set up, add and manage users at any time from **Settings**.
Add at least one Org Admin early. This ensures you always have full access to manage users, groups, and workspaces.
***
## Adding and Managing Users
You add and manage users through the **Settings** page. User and group management is handled entirely within the ContraForce portal — no separate enterprise application consent is required.
### Step 1: Access User Management
Click **Settings** in the navigation menu
Click the **User Management** tab
The user list displays all users with access to ContraForce
 ### Step 2: Add New Users
Click the **Add User** button in the top right corner
Search for the user by name or email in the Entra ID directory
Click the user to select them
Choose organizational and workspace roles
Click **Add** to complete the process
### Step 2: Add New Users
Click the **Add User** button in the top right corner
Search for the user by name or email in the Entra ID directory
Click the user to select them
Choose organizational and workspace roles
Click **Add** to complete the process
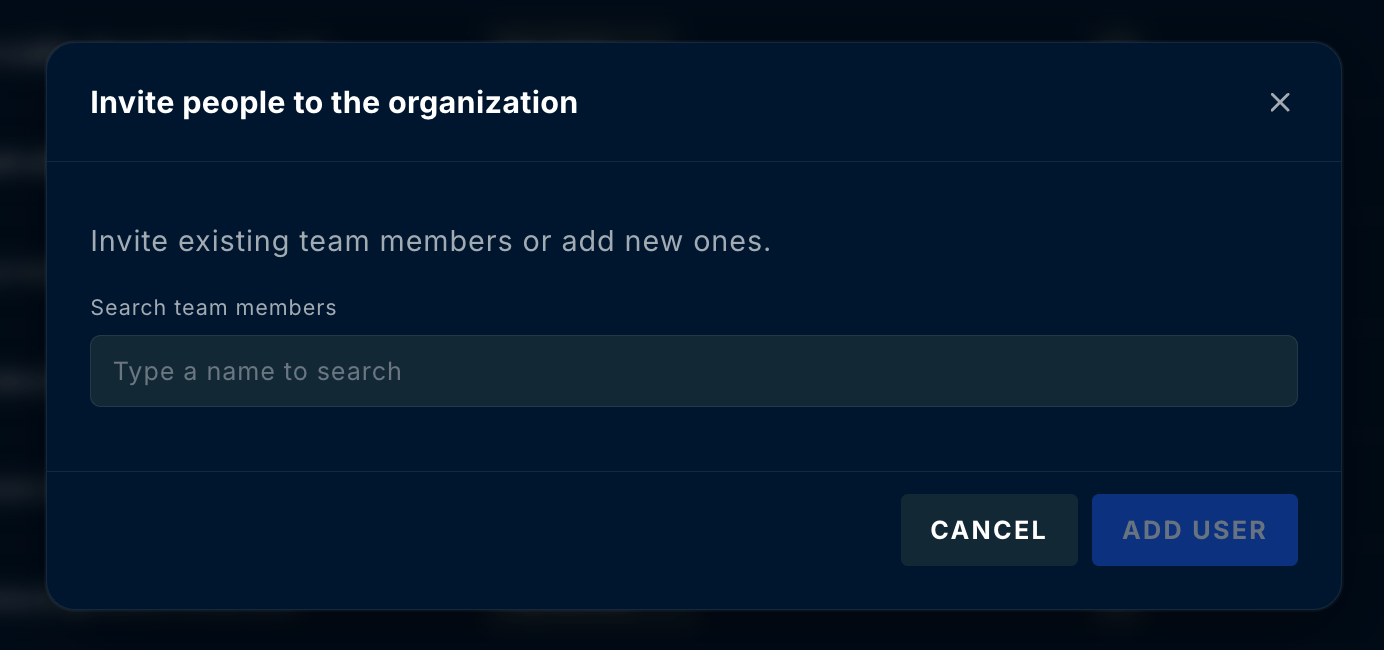 The **Add User** button only appears if your account has User Admin or Org Admin permissions.
***
## Understanding Role Types
### Organizational Roles
Organizational roles control administrative functions across your entire ContraForce instance:
| Role | Add/Manage Users | Add/Manage Groups | Add Workspaces | View All Workspaces |
| ------------------- | :--------------: | :---------------: | :------------: | :-----------------: |
| **Org Admin** | ✓ | ✓ | ✓ | ✓ |
| **User Admin** | ✓ | ✓ | — | — |
| **Workspace Admin** | — | — | ✓ | ✓ |
| **Org Member** | — | — | — | — |
### Workspace Roles
Workspace roles control what users can do within specific customer workspaces:
**Full access to all workspace features**
* View and manage all incidents
* Run any Gamebook action
* Manage endpoints and data connectors
* Configure workspace settings
* Manage workspace users
*Best for: Team leads, senior analysts, workspace owners*
**Operational access for active response**
* View all incidents
* Run Gamebook response actions
* Manage endpoints (isolate, scan, etc.)
* Cannot manage data connectors or users
*Best for: SOC analysts who need to take action*
**Read-only access for investigation**
* View all incidents
* Cannot run Gamebooks
* Cannot manage endpoints
* Cannot modify configurations
*Best for: Junior analysts, read-only stakeholders*
**Integration management focus**
* View all incidents
* Manage data connectors
* Cannot run Gamebooks
* Cannot manage endpoints
*Best for: Integration specialists, IT administrators*
***
## User Groups
Simplify access management by organizing users into groups.
### Benefits of Groups
Assign workspace access to multiple users at once
Update group membership instead of individual users
Ensure team members have the same permissions
### Creating Groups
Groups are managed on the **Group Management** tab under **Settings**.
The **Add User** button only appears if your account has User Admin or Org Admin permissions.
***
## Understanding Role Types
### Organizational Roles
Organizational roles control administrative functions across your entire ContraForce instance:
| Role | Add/Manage Users | Add/Manage Groups | Add Workspaces | View All Workspaces |
| ------------------- | :--------------: | :---------------: | :------------: | :-----------------: |
| **Org Admin** | ✓ | ✓ | ✓ | ✓ |
| **User Admin** | ✓ | ✓ | — | — |
| **Workspace Admin** | — | — | ✓ | ✓ |
| **Org Member** | — | — | — | — |
### Workspace Roles
Workspace roles control what users can do within specific customer workspaces:
**Full access to all workspace features**
* View and manage all incidents
* Run any Gamebook action
* Manage endpoints and data connectors
* Configure workspace settings
* Manage workspace users
*Best for: Team leads, senior analysts, workspace owners*
**Operational access for active response**
* View all incidents
* Run Gamebook response actions
* Manage endpoints (isolate, scan, etc.)
* Cannot manage data connectors or users
*Best for: SOC analysts who need to take action*
**Read-only access for investigation**
* View all incidents
* Cannot run Gamebooks
* Cannot manage endpoints
* Cannot modify configurations
*Best for: Junior analysts, read-only stakeholders*
**Integration management focus**
* View all incidents
* Manage data connectors
* Cannot run Gamebooks
* Cannot manage endpoints
*Best for: Integration specialists, IT administrators*
***
## User Groups
Simplify access management by organizing users into groups.
### Benefits of Groups
Assign workspace access to multiple users at once
Update group membership instead of individual users
Ensure team members have the same permissions
### Creating Groups
Groups are managed on the **Group Management** tab under **Settings**.
 Go to **Settings** > **Group Management**
Click **Add Group** and enter a name
Search for and add users to the group
Assign the group to workspaces with appropriate roles
***
## Assigning Users to Workspaces
Users need workspace assignments to access customer data.
### Individual Assignment
1. Open the workspace settings
2. Navigate to **Users** or **Access**
3. Click **Add User**
4. Select the user and assign a workspace role
5. Save changes
### Group Assignment
1. Open the workspace settings
2. Navigate to **Groups** or **Access**
3. Click **Add Group**
4. Select the group and assign a workspace role
5. All group members inherit access
Use groups for teams that need access to the same set of workspaces. This makes onboarding new team members faster—just add them to the appropriate group.
***
## Managing Existing Users
### Viewing User Details
Click any user in the User Management list to view:
* Assigned organizational role
* Workspace assignments and roles
* Group memberships
* Last login time
### Editing User Roles
Click the user in the User Management list
Modify organizational or workspace roles as needed
Click **Save** to apply the new permissions
### Removing Users
Click the user you want to remove
Click the **Remove User** or **Delete** button
Confirm the removal when prompted
Removing a user revokes all their access to ContraForce immediately. This action cannot be undone—you'll need to re-add the user if you want to restore access.
***
## Best Practices
Assign the minimum role necessary for each user's job function. Start with Incident Analyst and escalate to Responder or Admin only when needed.
Create groups that mirror your team structure (e.g., "Tier 1 Analysts", "Senior Responders"). This simplifies access management as team members change.
Review user assignments quarterly to ensure former team members have been removed and current roles are still appropriate.
Maintain records of who has access to which workspaces and why. This helps with compliance audits and access reviews.
Don't give everyone Admin access. Reserve Admin roles for users who genuinely need to manage configurations and other users.
***
## Troubleshooting
### Common Issues
| Issue | Possible Cause | Solution |
| ------------------------------- | ------------------------------------ | ------------------------------------------------------------------------------------------------- |
| **Can't see Add User button** | Missing User Admin or Org Admin role | Contact your administrator for elevated permissions |
| **User not found in dropdown** | User doesn't exist in Entra ID | Verify user exists in Microsoft Entra ID |
| **Consent flow fails** | Insufficient admin privileges | Admin consent for ContraForce enterprise applications requires a **Global Administrator** account |
| **User can't access workspace** | No workspace assignment | Assign user directly or via group to the workspace |
| **User has wrong permissions** | Incorrect role assignment | Edit user and assign correct workspace role |
***
## Related Guides
Complete permissions for all roles
Manage workspace settings
Service principals and consent
Managing multiple customers
***
Questions about user management? Contact us at [support@contraforce.com](mailto:support@contraforce.com).
Go to **Settings** > **Group Management**
Click **Add Group** and enter a name
Search for and add users to the group
Assign the group to workspaces with appropriate roles
***
## Assigning Users to Workspaces
Users need workspace assignments to access customer data.
### Individual Assignment
1. Open the workspace settings
2. Navigate to **Users** or **Access**
3. Click **Add User**
4. Select the user and assign a workspace role
5. Save changes
### Group Assignment
1. Open the workspace settings
2. Navigate to **Groups** or **Access**
3. Click **Add Group**
4. Select the group and assign a workspace role
5. All group members inherit access
Use groups for teams that need access to the same set of workspaces. This makes onboarding new team members faster—just add them to the appropriate group.
***
## Managing Existing Users
### Viewing User Details
Click any user in the User Management list to view:
* Assigned organizational role
* Workspace assignments and roles
* Group memberships
* Last login time
### Editing User Roles
Click the user in the User Management list
Modify organizational or workspace roles as needed
Click **Save** to apply the new permissions
### Removing Users
Click the user you want to remove
Click the **Remove User** or **Delete** button
Confirm the removal when prompted
Removing a user revokes all their access to ContraForce immediately. This action cannot be undone—you'll need to re-add the user if you want to restore access.
***
## Best Practices
Assign the minimum role necessary for each user's job function. Start with Incident Analyst and escalate to Responder or Admin only when needed.
Create groups that mirror your team structure (e.g., "Tier 1 Analysts", "Senior Responders"). This simplifies access management as team members change.
Review user assignments quarterly to ensure former team members have been removed and current roles are still appropriate.
Maintain records of who has access to which workspaces and why. This helps with compliance audits and access reviews.
Don't give everyone Admin access. Reserve Admin roles for users who genuinely need to manage configurations and other users.
***
## Troubleshooting
### Common Issues
| Issue | Possible Cause | Solution |
| ------------------------------- | ------------------------------------ | ------------------------------------------------------------------------------------------------- |
| **Can't see Add User button** | Missing User Admin or Org Admin role | Contact your administrator for elevated permissions |
| **User not found in dropdown** | User doesn't exist in Entra ID | Verify user exists in Microsoft Entra ID |
| **Consent flow fails** | Insufficient admin privileges | Admin consent for ContraForce enterprise applications requires a **Global Administrator** account |
| **User can't access workspace** | No workspace assignment | Assign user directly or via group to the workspace |
| **User has wrong permissions** | Incorrect role assignment | Edit user and assign correct workspace role |
***
## Related Guides
Complete permissions for all roles
Manage workspace settings
Service principals and consent
Managing multiple customers
***
Questions about user management? Contact us at [support@contraforce.com](mailto:support@contraforce.com).