> ## Documentation Index
> Fetch the complete documentation index at: https://docs.contraforce.com/llms.txt
> Use this file to discover all available pages before exploring further.
# Incident Management
> A complete workflow for triaging, investigating, and resolving security incidents in ContraForce.
This guide walks you through the recommended workflow for managing security incidents in ContraForce—from initial triage to resolution.
ContraForce empowers analysts to efficiently manage incidents across multiple tenants and data sources. This workflow is designed to help you resolve incidents faster and deliver better service to your customers.
## Workflow Overview
Focus on specific tenants or view all incidents across your environment
Route incidents to the appropriate analyst
Review the incident summary, entities, timeline, and evidence
Execute automated response actions with one click
Document findings and close with proper classification
## 1. Workspace Filtering
The Command Page allows you to customize which incidents are displayed by filtering on Workspace, Severity, and Status. These filters persist as you navigate between pages in ContraForce.
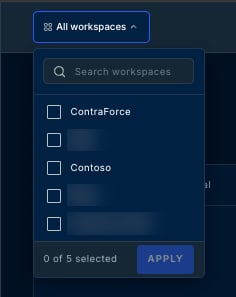
### Setting Your Workspace Filter
Click the workspace dropdown menu in the top bar of the Command dashboard
Choose one or more workspaces to display
The Incidents table updates to show only data from selected workspaces
 ## 2. Setting Your Incident Assignees Filter
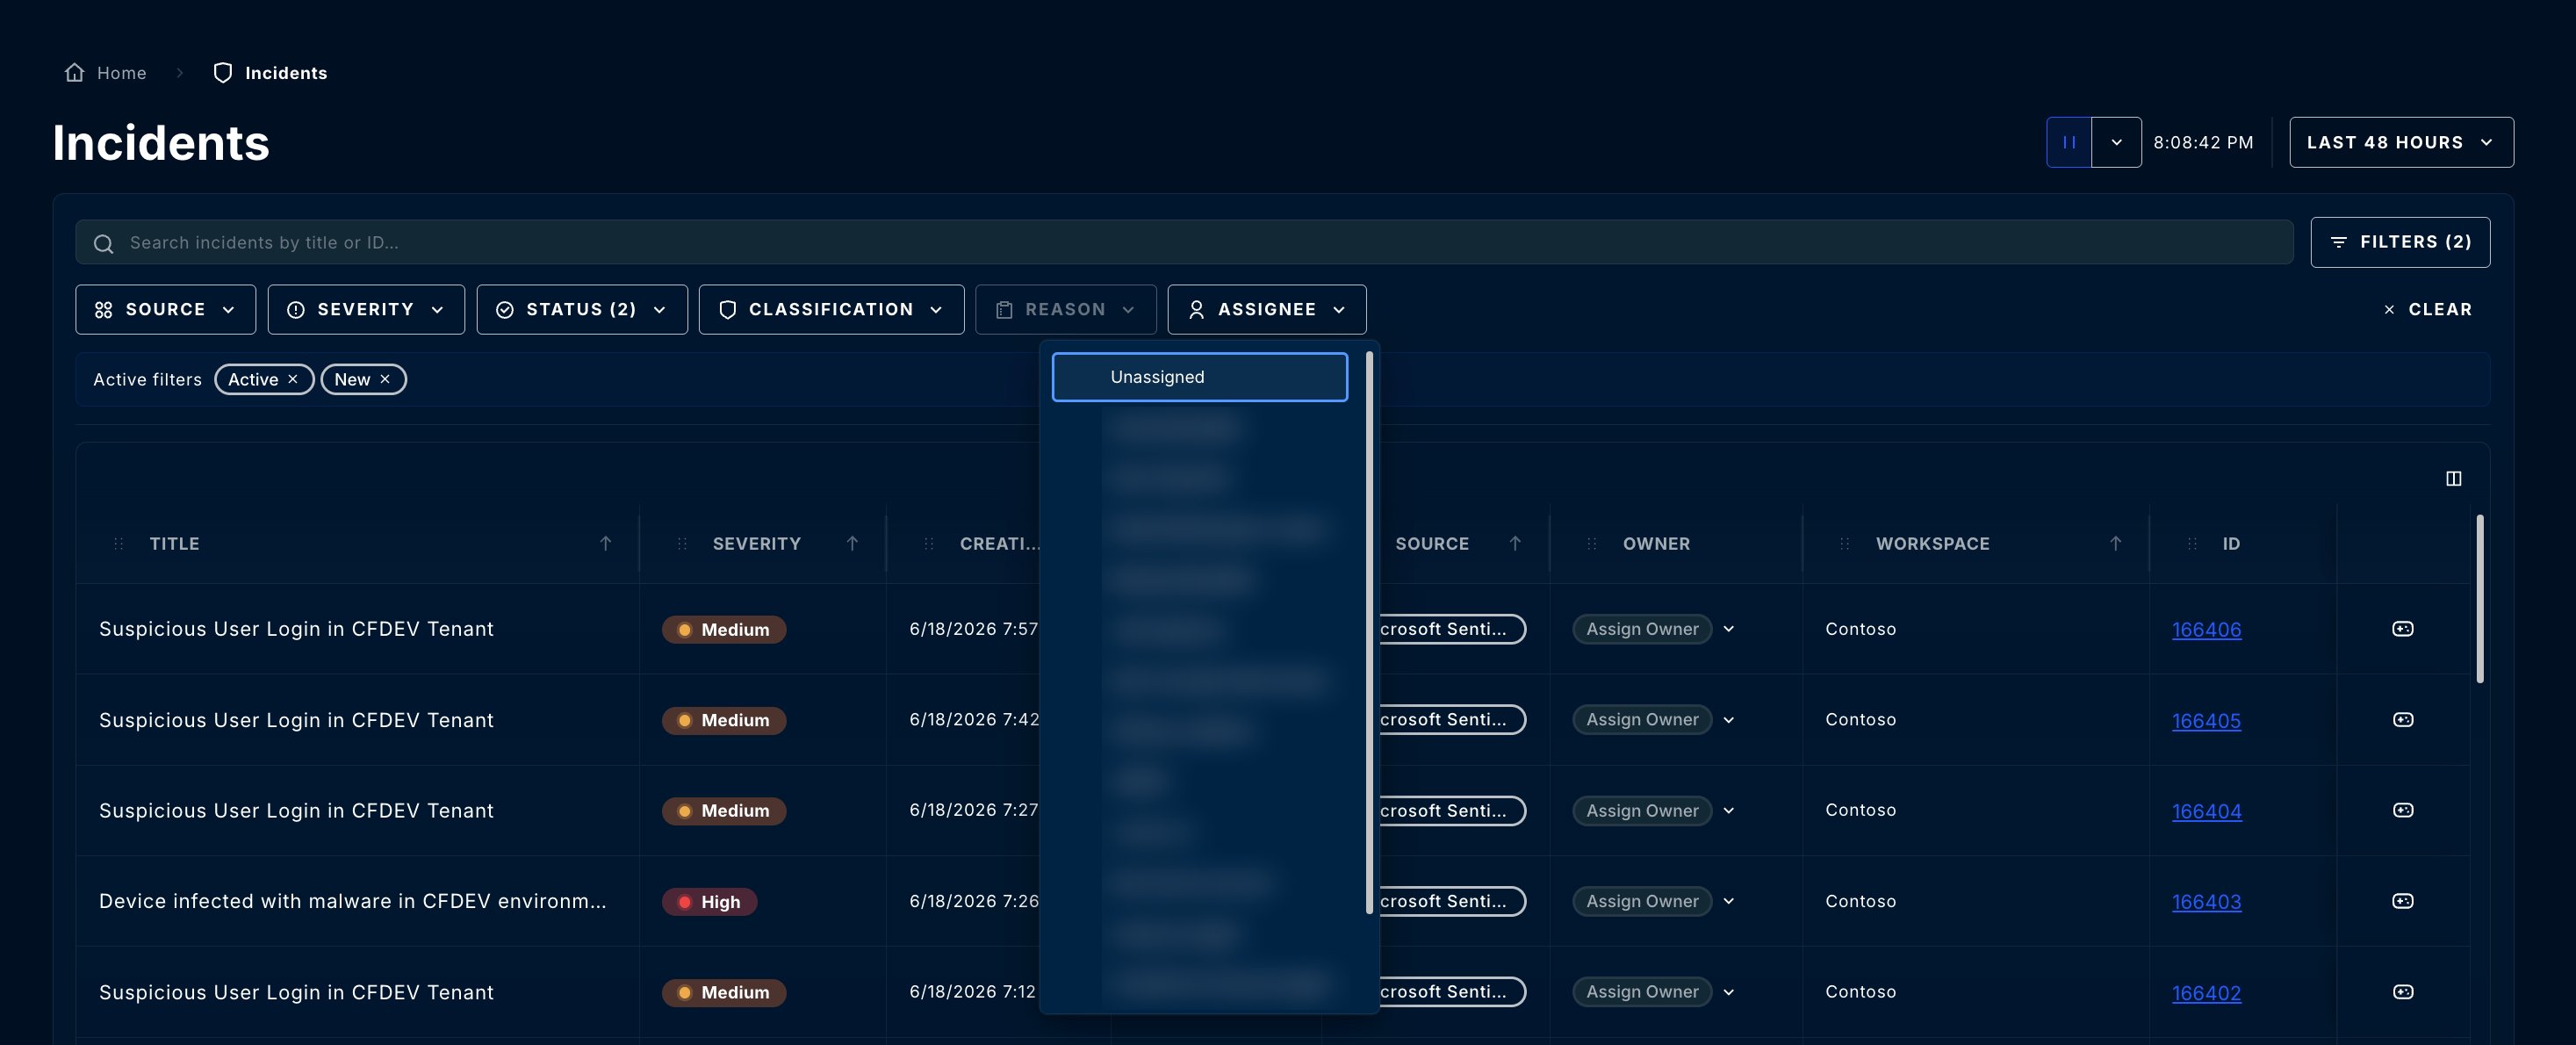
Click the assignee dropdown menu in the top bar of the Command Page
Choose one or more workspaces to display
The Incidents table updates to show only incidents from selected assignees
## 2. Setting Your Incident Assignees Filter
Click the assignee dropdown menu in the top bar of the Command Page
Choose one or more workspaces to display
The Incidents table updates to show only incidents from selected assignees
 ### Additional Filters
Beyond workspace filtering, you can further refine your view:
| Filter | Options | Use Case |
| ------------ | -------------------------------- | ------------------------------------ |
| **Severity** | High, Medium, Low, Informational | Focus on critical incidents first |
| **Status** | New, Active, Closed | View only incidents requiring action |
| **Module** | Sentinel, Defender for Endpoint | Filter by security product |
When filtering by status, you'll see statuses organized by module (Sentinel, Defender for Endpoint, etc.). This helps you quickly identify incidents by source.
***
## 2. Incident Assignment
Proper incident assignment ensures the right analyst handles each incident and provides clear ownership for tracking.
### Individual Assignment
To assign a single incident:
1. Locate the incident in the Incidents table
2. Click the dropdown in the **Owner** column
3. Select an analyst from the list of portal users
### Handling Incidents at Scale
There's no manual bulk-update action. **Security Delivery Agents** running **on queue** automatically triage and act on incidents in bulk as they arrive, so you don't have to process them batch by batch. See [Configuring Security Delivery Agents](/guides/getting-started/configuring-security-delivery-agents).
***
## 3. Incident Summary
The Incident Summary provides a complete view of an incident with all the context you need for investigation.
### Accessing the Summary
Click any **Incident ID** in the Incidents table to open its Summary view.
### Additional Filters
Beyond workspace filtering, you can further refine your view:
| Filter | Options | Use Case |
| ------------ | -------------------------------- | ------------------------------------ |
| **Severity** | High, Medium, Low, Informational | Focus on critical incidents first |
| **Status** | New, Active, Closed | View only incidents requiring action |
| **Module** | Sentinel, Defender for Endpoint | Filter by security product |
When filtering by status, you'll see statuses organized by module (Sentinel, Defender for Endpoint, etc.). This helps you quickly identify incidents by source.
***
## 2. Incident Assignment
Proper incident assignment ensures the right analyst handles each incident and provides clear ownership for tracking.
### Individual Assignment
To assign a single incident:
1. Locate the incident in the Incidents table
2. Click the dropdown in the **Owner** column
3. Select an analyst from the list of portal users
### Handling Incidents at Scale
There's no manual bulk-update action. **Security Delivery Agents** running **on queue** automatically triage and act on incidents in bulk as they arrive, so you don't have to process them batch by batch. See [Configuring Security Delivery Agents](/guides/getting-started/configuring-security-delivery-agents).
***
## 3. Incident Summary
The Incident Summary provides a complete view of an incident with all the context you need for investigation.
### Accessing the Summary
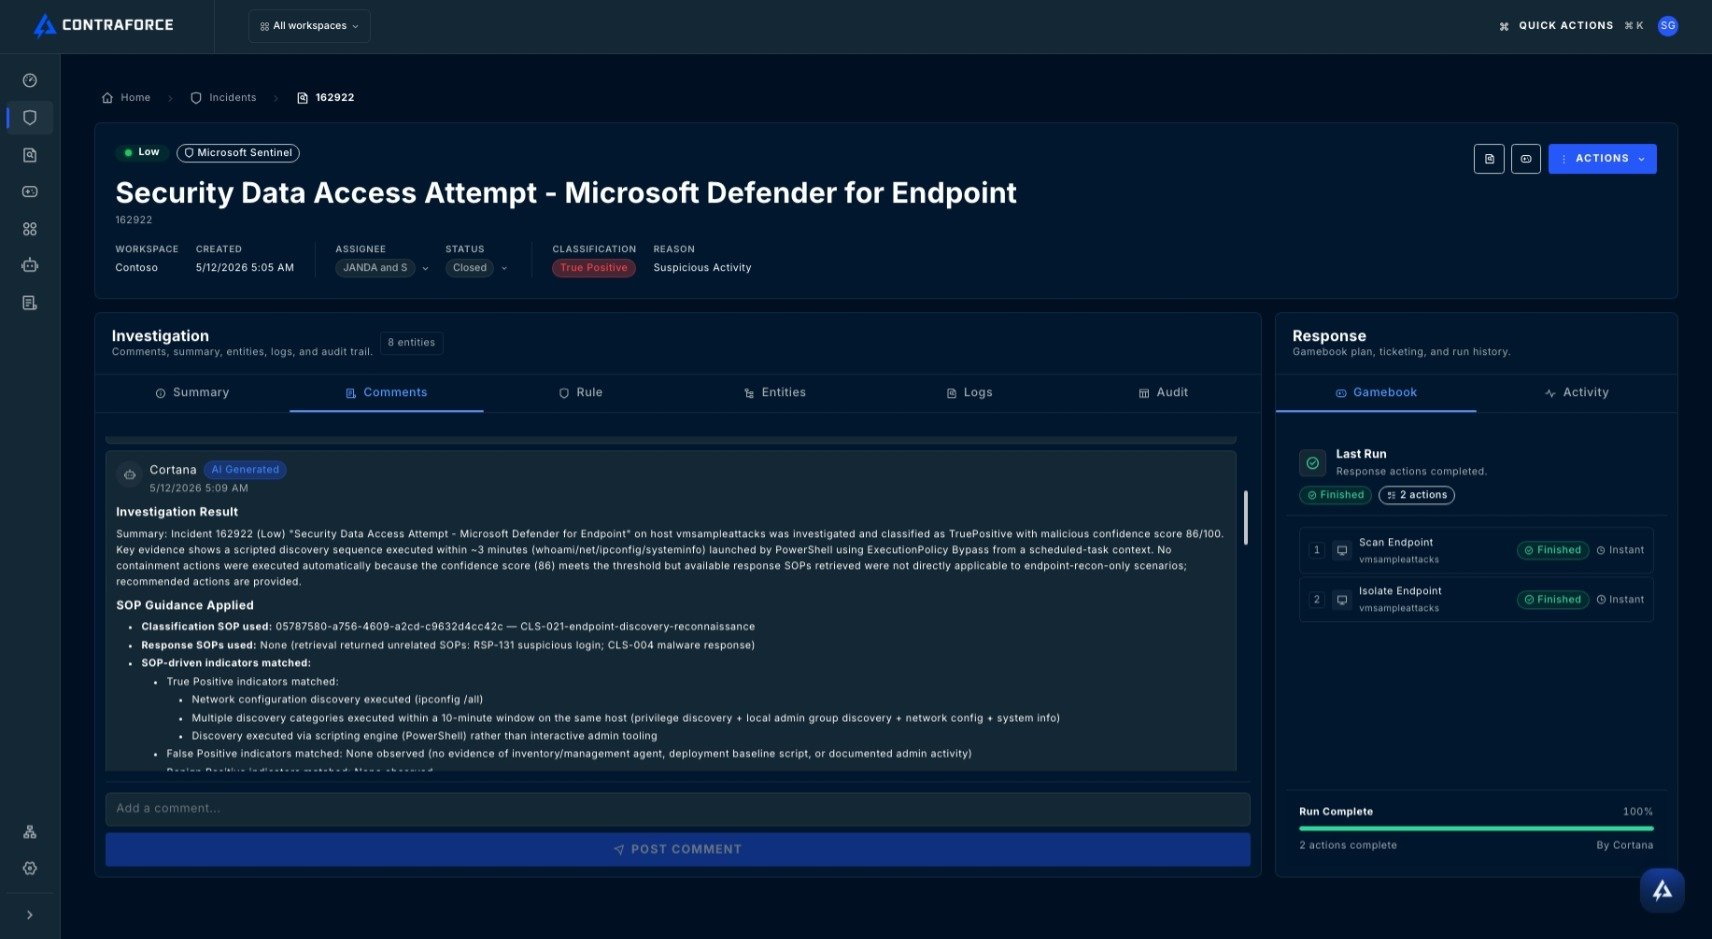
Click any **Incident ID** in the Incidents table to open its Summary view.
 ### Incident Tabs
**Summary** – Overview of the incident including severity, status, affected assets, and key details at a glance.
**Rule** – Shows the detection rule that triggered the incident, including rule logic, conditions, and configuration.
**Entities** – Lists all related entities (users, devices, IPs, domains, files) involved in or affected by the incident.
**Timeline** – Chronological view of all events and actions related to the incident from detection through resolution.
**Logs** – Raw log data and events associated with the incident for deeper investigation.
**Comments** – Collaboration space for analysts and AI agents to add notes, findings, and communicate about the investigation.
**Audit** – Track record of all changes made to the incident (status updates, assignments, modifications) with timestamps and user attribution.
## 4. Gamebook Responses
Gamebooks SOP driven AI-generated and human created response actions that let you quickly respond to incidents.
Available Gamebook actions are determined by the entity types present in the incident. Agents automatically suggests relevant actions based on the output of the investigation and incident classification.
### Using Suggested Gamebooks
If a Gamebook has been previously executed for similar incidents, agents suggest it automatically:
### Incident Tabs
**Summary** – Overview of the incident including severity, status, affected assets, and key details at a glance.
**Rule** – Shows the detection rule that triggered the incident, including rule logic, conditions, and configuration.
**Entities** – Lists all related entities (users, devices, IPs, domains, files) involved in or affected by the incident.
**Timeline** – Chronological view of all events and actions related to the incident from detection through resolution.
**Logs** – Raw log data and events associated with the incident for deeper investigation.
**Comments** – Collaboration space for analysts and AI agents to add notes, findings, and communicate about the investigation.
**Audit** – Track record of all changes made to the incident (status updates, assignments, modifications) with timestamps and user attribution.
## 4. Gamebook Responses
Gamebooks SOP driven AI-generated and human created response actions that let you quickly respond to incidents.
Available Gamebook actions are determined by the entity types present in the incident. Agents automatically suggests relevant actions based on the output of the investigation and incident classification.
### Using Suggested Gamebooks
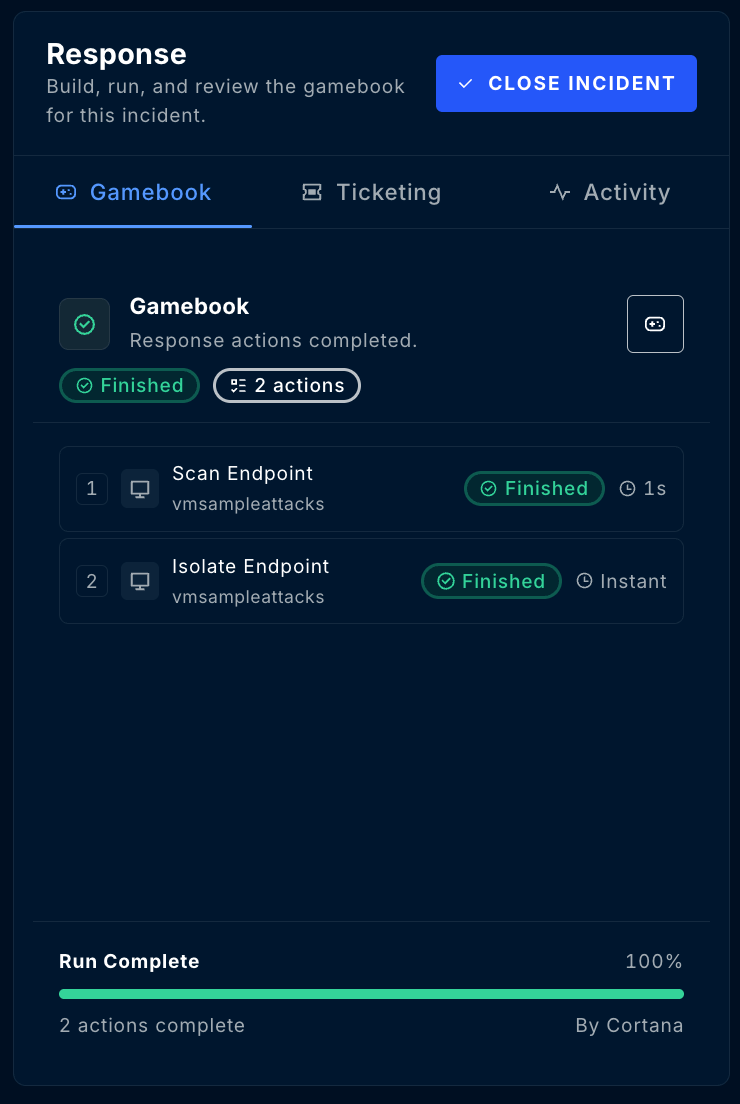
If a Gamebook has been previously executed for similar incidents, agents suggest it automatically:
 ### Creating a Custom Gamebook
Click the dropdown next to "Edit" and select **Create New Gamebook**
Click entity icons in the Entity Graph to see available response actions
* Use the arrows to navigate through action options
* Click the green **+** icon to add an action
* Click the red **-** icon to remove an action
Click **Approve Gamebook** to execute all selected actions
### Gamebook Approval Workflow
Some Gamebook actions require approval before execution:
Actions with a **red lock icon** require approval from a user with appropriate permissions in the tenant.
**To request approval:**
1. Build your Gamebook as usual
2. Click **Request Gamebook Approval** (instead of Run Gamebook)
3. The request is sent to authorized approvers
**To approve a Gamebook:**
* Approvers can approve directly from the incident, or
* Use the **Gamebook Activity** tab to review and approve pending requests
***
## 5. Incident Closure
After completing your investigation and response, close the incident with proper documentation.
### Creating a Custom Gamebook
Click the dropdown next to "Edit" and select **Create New Gamebook**
Click entity icons in the Entity Graph to see available response actions
* Use the arrows to navigate through action options
* Click the green **+** icon to add an action
* Click the red **-** icon to remove an action
Click **Approve Gamebook** to execute all selected actions
### Gamebook Approval Workflow
Some Gamebook actions require approval before execution:
Actions with a **red lock icon** require approval from a user with appropriate permissions in the tenant.
**To request approval:**
1. Build your Gamebook as usual
2. Click **Request Gamebook Approval** (instead of Run Gamebook)
3. The request is sent to authorized approvers
**To approve a Gamebook:**
* Approvers can approve directly from the incident, or
* Use the **Gamebook Activity** tab to review and approve pending requests
***
## 5. Incident Closure
After completing your investigation and response, close the incident with proper documentation.
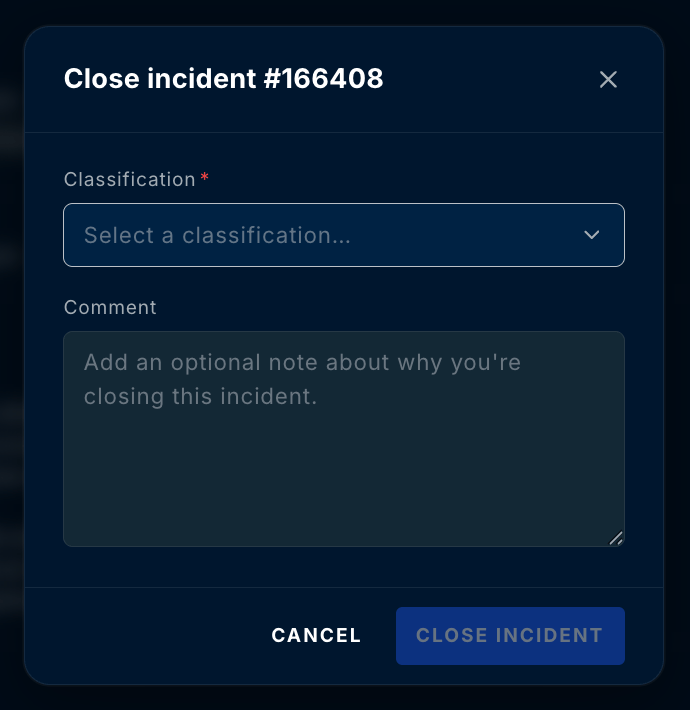 ### Quick Close from Gamebook
After a Gamebook completes, a green **Close Incident** button appears at the bottom of the Gamebook context group.
### Closure Fields
| Field | Options | Purpose |
| ------------------ | ------------------------------------------------------------ | --------------------------------------------------- |
| **Classification** | True Positive, False Positive, Benign Positive, Undetermined | Required. Categorizes the incident outcome |
| **Comment** | Free text | Optional note about why you're closing the incident |
Need help understanding classifications? See [Understanding Incident Classifications](/guides/getting-started/understanding-incident-classifications) for detailed guidance.
***
## Putting It Together
The ContraForce incident management workflow is designed to help you:
Filter and prioritize incidents across all your tenants from one dashboard
Execute proven response actions with Gamebooks instead of manual remediation
Maintain complete audit trails with comments, classifications, and history
***
## Related Guides
Learn more about the central incident dashboard.
Deep dive into SOP driven automated response actions.
Learn how to manage incidents in your workbench.
Understand True Positive, False Positive, and more.
***
Questions about this workflow? Contact us at [support@contraforce.com](mailto:support@contraforce.com). We're happy to help optimize your incident management process.
### Quick Close from Gamebook
After a Gamebook completes, a green **Close Incident** button appears at the bottom of the Gamebook context group.
### Closure Fields
| Field | Options | Purpose |
| ------------------ | ------------------------------------------------------------ | --------------------------------------------------- |
| **Classification** | True Positive, False Positive, Benign Positive, Undetermined | Required. Categorizes the incident outcome |
| **Comment** | Free text | Optional note about why you're closing the incident |
Need help understanding classifications? See [Understanding Incident Classifications](/guides/getting-started/understanding-incident-classifications) for detailed guidance.
***
## Putting It Together
The ContraForce incident management workflow is designed to help you:
Filter and prioritize incidents across all your tenants from one dashboard
Execute proven response actions with Gamebooks instead of manual remediation
Maintain complete audit trails with comments, classifications, and history
***
## Related Guides
Learn more about the central incident dashboard.
Deep dive into SOP driven automated response actions.
Learn how to manage incidents in your workbench.
Understand True Positive, False Positive, and more.
***
Questions about this workflow? Contact us at [support@contraforce.com](mailto:support@contraforce.com). We're happy to help optimize your incident management process.