> ## Documentation Index
> Fetch the complete documentation index at: https://docs.contraforce.com/llms.txt
> Use this file to discover all available pages before exploring further.
# Workspace Center
> Manage customer tenants, pre-onboard new customers, monitor workspace health, and configure modules from one central location.
The **Workspace Center** is your administrative control panel for every customer tenant. Monitor active workspaces at a glance, pre-onboard new customers, and drill into per-workspace settings.
Workspaces represent individual customer tenants in ContraForce. Each workspace has its own data, configurations, modules, and user permissions.
## What Can You Do Here?
Create workspace placeholders before customer admins complete their setup
Edit module settings, integrations, and access from the per-workspace settings page
See which workspaces are healthy, need attention, or are still onboarding
Manage module consents and workspace-level access
***
## Accessing the Workspace Center
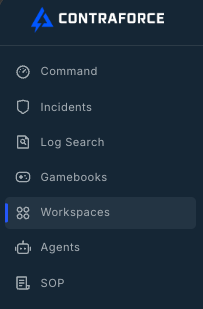
Find the **Workspaces** icon in the left navigation bar
Click the icon to open the Workspace Center
 ## Workspace Center Overview
The Workspace Center is split into two tabs and a row of rollup KPI cards.
## Workspace Center Overview
The Workspace Center is split into two tabs and a row of rollup KPI cards.
 ### Rollup KPI cards
The cards at the top of the page show counts at a glance and are clickable shortcuts.
| Card | What it shows | What clicking does |
| ------------------------ | ---------------------------------------------------------------- | ------------------------------------------------------------------ |
| **Workspaces connected** | Active customer workspaces in a healthy state | Switches to the Workspaces tab with the **All** filter |
| **Need attention** | Active workspaces that have a missing module or undeployed agent | Switches to the Workspaces tab with the **Needs attention** filter |
| **Onboarding** | Pre-onboarded workspaces awaiting customer admin setup | Switches to the Onboarding tab |
### Tabs
| Tab | What it contains |
| -------------- | ----------------------------------------------------------------------------------------------------------------------------------------------- |
| **Workspaces** | Active customer workspaces. Search, filter by health, and click a card to open its settings page |
| **Onboarding** | Pre-onboarded workspaces awaiting customer admin setup. Add a new workspace from here, or click an existing card to see its onboarding progress |
***
## Workspace Cards
Each workspace renders as a card. Click any card to open its settings page (no gear or equalizer button needed).
### Rollup KPI cards
The cards at the top of the page show counts at a glance and are clickable shortcuts.
| Card | What it shows | What clicking does |
| ------------------------ | ---------------------------------------------------------------- | ------------------------------------------------------------------ |
| **Workspaces connected** | Active customer workspaces in a healthy state | Switches to the Workspaces tab with the **All** filter |
| **Need attention** | Active workspaces that have a missing module or undeployed agent | Switches to the Workspaces tab with the **Needs attention** filter |
| **Onboarding** | Pre-onboarded workspaces awaiting customer admin setup | Switches to the Onboarding tab |
### Tabs
| Tab | What it contains |
| -------------- | ----------------------------------------------------------------------------------------------------------------------------------------------- |
| **Workspaces** | Active customer workspaces. Search, filter by health, and click a card to open its settings page |
| **Onboarding** | Pre-onboarded workspaces awaiting customer admin setup. Add a new workspace from here, or click an existing card to see its onboarding progress |
***
## Workspace Cards
Each workspace renders as a card. Click any card to open its settings page (no gear or equalizer button needed).
 ### What's on a card
| Element | Description |
| ----------------------------------- | ------------------------------------------------------------------------------------------------------------------------------------- |
| **Status light** (top-right corner) | Green: healthy. Amber: needs attention. Blue: pre-onboarded. Hidden on the service provider's own workspace |
| **Workspace name** | The customer's friendly name |
| **Tenant ID** | The customer's Microsoft Entra tenant ID, in muted text below the name |
| **Inline chip** | "Your workspace" on the service provider's own card; "Service provider" if the row represents the MSP itself with no monitoring on it |
| **Modules pill** | Visible on the Workspaces tab. Healthy when at least one detection module is configured |
| **Agent pill** | Visible on the Workspaces tab. Healthy when an Agent Center is deployed |
Health pills only appear on the Workspaces tab. The Onboarding tab uses the blue **pre-onboarded** status light instead, since health checks are not meaningful until the customer admin completes their onboarding.
***
## Search and Filter
Both tabs include a **Search by workspace name** field that filters cards as you type.
The Workspaces tab also has filter chips:
| Filter | Description |
| ------------------- | ----------------------------------------------------------------------------- |
| **All** | Every active workspace, regardless of health |
| **Needs attention** | Active workspaces with a missing detection module or no deployed Agent Center |
| **Healthy** | Active workspaces with both a detection module and an Agent Center deployed |
The Onboarding tab does not have filter chips. Use search to narrow the list when you have many pre-onboarded workspaces.
***
## Opening Workspace Details
Click any card to open the workspace's settings page.
### What's on a card
| Element | Description |
| ----------------------------------- | ------------------------------------------------------------------------------------------------------------------------------------- |
| **Status light** (top-right corner) | Green: healthy. Amber: needs attention. Blue: pre-onboarded. Hidden on the service provider's own workspace |
| **Workspace name** | The customer's friendly name |
| **Tenant ID** | The customer's Microsoft Entra tenant ID, in muted text below the name |
| **Inline chip** | "Your workspace" on the service provider's own card; "Service provider" if the row represents the MSP itself with no monitoring on it |
| **Modules pill** | Visible on the Workspaces tab. Healthy when at least one detection module is configured |
| **Agent pill** | Visible on the Workspaces tab. Healthy when an Agent Center is deployed |
Health pills only appear on the Workspaces tab. The Onboarding tab uses the blue **pre-onboarded** status light instead, since health checks are not meaningful until the customer admin completes their onboarding.
***
## Search and Filter
Both tabs include a **Search by workspace name** field that filters cards as you type.
The Workspaces tab also has filter chips:
| Filter | Description |
| ------------------- | ----------------------------------------------------------------------------- |
| **All** | Every active workspace, regardless of health |
| **Needs attention** | Active workspaces with a missing detection module or no deployed Agent Center |
| **Healthy** | Active workspaces with both a detection module and an Agent Center deployed |
The Onboarding tab does not have filter chips. Use search to narrow the list when you have many pre-onboarded workspaces.
***
## Opening Workspace Details
Click any card to open the workspace's settings page.
 The settings page exposes four areas:
* **General**
1. **Account Information and Service Provider Information**: account identifiers, points of contact, account ID, account type, and subscription information
2. **Allow Service Providers to Run Gamebooks**: manage the team members responsible for approving Gamebooks that require manual authorization. Only users with the Workspace Owner role can be assigned as Gamebook Approvers
* **Modules**: configure and manage detection and response modules
* **IAM**: manage users, groups, and permissions at the workspace level
* **Notifications**: configure the notifications module for Microsoft Sentinel
***
## Pre-Onboarding a Customer Workspace
Pre-onboarding lets you prepare a customer's workspace before they complete onboarding themselves. The customer admin receives an invite email and finishes the rest. See [Customer Workspace Onboarding](/guides/onboarding/customer-workspace-onboarding) for the customer-side flow.
### Why pre-onboard?
Configuration is ready when the customer is
Verify settings before the customer is invited
Schedule onboardings in advance
### Creating a pre-onboarded workspace
Click the **Onboarding** tab at the top of the Workspace Center
The button is in the top-right of the toolbar. The right-hand rail panel opens with the **Add workspace** form
The settings page exposes four areas:
* **General**
1. **Account Information and Service Provider Information**: account identifiers, points of contact, account ID, account type, and subscription information
2. **Allow Service Providers to Run Gamebooks**: manage the team members responsible for approving Gamebooks that require manual authorization. Only users with the Workspace Owner role can be assigned as Gamebook Approvers
* **Modules**: configure and manage detection and response modules
* **IAM**: manage users, groups, and permissions at the workspace level
* **Notifications**: configure the notifications module for Microsoft Sentinel
***
## Pre-Onboarding a Customer Workspace
Pre-onboarding lets you prepare a customer's workspace before they complete onboarding themselves. The customer admin receives an invite email and finishes the rest. See [Customer Workspace Onboarding](/guides/onboarding/customer-workspace-onboarding) for the customer-side flow.
### Why pre-onboard?
Configuration is ready when the customer is
Verify settings before the customer is invited
Schedule onboardings in advance
### Creating a pre-onboarded workspace
Click the **Onboarding** tab at the top of the Workspace Center
The button is in the top-right of the toolbar. The right-hand rail panel opens with the **Add workspace** form
 | Field | Description |
| ---------------------------------- | ---------------------------------------------------------- |
| **Workspace name** | Friendly label you'll use to refer to this customer |
| **Tenant ID** | The customer's Microsoft Entra tenant ID |
| **Primary point-of-contact email** | The customer admin who will receive the invite |
| **Detection modules** | Pre-select the security tools the customer is bringing |
| **Response modules** | Pre-select the response capabilities the customer will use |
ContraForce sends an invite email to the POC. The new workspace appears as a card on the Onboarding tab with a **Pending customer setup** badge
| Field | Description |
| ---------------------------------- | ---------------------------------------------------------- |
| **Workspace name** | Friendly label you'll use to refer to this customer |
| **Tenant ID** | The customer's Microsoft Entra tenant ID |
| **Primary point-of-contact email** | The customer admin who will receive the invite |
| **Detection modules** | Pre-select the security tools the customer is bringing |
| **Response modules** | Pre-select the response capabilities the customer will use |
ContraForce sends an invite email to the POC. The new workspace appears as a card on the Onboarding tab with a **Pending customer setup** badge
 Click any pre-onboarded card to see its onboarding progress in the right-hand rail. Use this to confirm which modules the customer has connected so far.
### When the customer finishes onboarding
You'll receive a real-time **Customer onboarding complete** notification in the portal. The card moves from the Onboarding tab to the Workspaces tab, and the status light flips from blue (pre-onboarded) to green (healthy) or amber (needs attention) based on what the customer connected.
For the post-go-live verification runbook, see [Workspace Onboarding Verification](/guides/onboarding/workspace-onboarding-checklist).
***
## Module Management
Each workspace can have different modules enabled based on customer needs. Open a workspace's settings page (click the card), then go to the **Modules** tab.
### Available modules
| Module | Description | Key features |
| ------------------------------- | ------------------------------ | ---------------------------------------------------------------------- |
| Microsoft Defender for Endpoint | Microsoft Defender integration | Endpoint detection, response actions, device management |
| Microsoft Sentinel | Microsoft Sentinel integration | Log analysis, custom alerts, threat hunting |
| SentinelOne XDR | SentinelOne XDR integration | Read SentinelOne alerts and respond to SentinelOne endpoints |
| CrowdStrike | CrowdStrike Falcon integration | CrowdStrike detection and response |
| Notifications | Incident notification engine | Email notifications for Microsoft Sentinel incidents based on severity |
### Configuring modules
Click the workspace card to open its settings page
Navigate to the module you want to configure
Enable or disable features, set thresholds, configure options
Click **Consent** to authorize required permissions for the module
Apply the configuration
### Module-specific settings
Basic workspace settings:
* Workspace name
* Alias name
* Domain
* Points of contact
* Email address
* Subscription ID
* Subscription type
Enable or disable ContraForce modules:
* Microsoft Sentinel (Detection + Response)
Prerequisites to manage this module:
* Microsoft Entra Role: Global Administrator (required to grant the module Consent)
* ContraForce Workspace Role: Owner
* Microsoft Subscription Permission: Owner
You can access the Content Management System for Microsoft Sentinel by clicking the icon in the Microsoft Sentinel module.
* Microsoft Defender for Endpoint (Detection + Response)
Prerequisites to manage this module:
* Microsoft Entra Role: Global Administrator (required to grant the module Consent)
* ContraForce Workspace Role: Owner
* SentinelOne XDR (Detection + Response)
Prerequisites to manage this module:
* ContraForce Workspace Role: Owner
* Gamebooks for Defender XDR (Response for endpoints)
* Gamebooks for Identity (Response for users)
* Gamebooks for Microsoft 365 (Response for emails)
* Gamebooks for Azure (Response for Azure NSG)
* Gamebooks for SentinelOne (Response for endpoints)
Group Management. Workspace Roles:
* Owner
* Content Admin
* Incident Responder
* Incident Analyst
Use Role Management. User Roles:
* Owner
* Content Admin
* Incident Responder
* Incident Analyst
Notification Settings:
Prerequisites to manage this module:
* ContraForce Workspace Role: Owner
* Sentinel Module Configured
Microsoft Sentinel Notifications Settings Based on Severity:
* High
* Medium
* Low
* Info
***
## Permission Consent
Some features require explicit consent to Microsoft enterprise applications.
### Why consent is required
ContraForce uses Microsoft Graph API and other APIs to:
* Read security alerts and incidents
* Execute response actions (isolate devices, disable users)
* Access log data for analysis
These permissions must be granted by a tenant administrator.
### Granting consent
Click the workspace card to open its settings page
Find the module that needs consent
A Microsoft authentication window opens
Sign in with a **Global Administrator** account. ContraForce uses app-only Microsoft Graph permissions, so Cloud App Admin or Application Admin cannot grant this consent
Review the requested permissions and click **Accept**
Consent requires **Global Administrator** privileges in the customer's Microsoft tenant. Work with your customer's IT team if you don't have Global Administrator access.
Complete guide to platform users, groups, permissions, and modules
***
## Best Practices
Name workspaces consistently (for example, "CustomerName: Primary") so they're easy to identify in search and filters.
Create pre-onboarded workspaces before onboarding calls so the customer admin can complete their onboarding immediately.
Periodically click the **Need attention** rollup card to surface workspaces missing a detection module or Agent Center.
Token expirations or policy changes can affect access. Open a workspace's Modules tab to confirm everything still shows **Connected**.
Keep records of which modules and settings are enabled for each customer for support and renewal conversations.
***
## Troubleshooting
### Common Issues
| Issue | Possible cause | Solution |
| ------------------------------------------------ | ----------------------------------------- | -------------------------------------------------------------------------- |
| Workspace shows no data | Consent not completed | Re-run consent flow with admin credentials |
| Module won't enable | Missing permissions | Verify required permissions are granted |
| Pre-onboarded card never moves to Workspaces tab | Customer admin hasn't finished onboarding | Resend the invite or contact the POC |
| Configuration won't save | Validation error | Check for required fields or invalid values |
| Status light is amber | Detection module or Agent Center missing | Open the workspace card and complete the missing module or deploy an agent |
If you encounter persistent issues with workspace configuration, contact [support@contraforce.com](mailto:support@contraforce.com) with the workspace name and error details.
***
## Related Guides
Granting access, Agent Center, connecting your own sources
What customer admins see after the invite email
Post-go-live verification runbook
Managing multiple workspaces
***
Questions about the Workspace Center? Contact us at [support@contraforce.com](mailto:support@contraforce.com).
Click any pre-onboarded card to see its onboarding progress in the right-hand rail. Use this to confirm which modules the customer has connected so far.
### When the customer finishes onboarding
You'll receive a real-time **Customer onboarding complete** notification in the portal. The card moves from the Onboarding tab to the Workspaces tab, and the status light flips from blue (pre-onboarded) to green (healthy) or amber (needs attention) based on what the customer connected.
For the post-go-live verification runbook, see [Workspace Onboarding Verification](/guides/onboarding/workspace-onboarding-checklist).
***
## Module Management
Each workspace can have different modules enabled based on customer needs. Open a workspace's settings page (click the card), then go to the **Modules** tab.
### Available modules
| Module | Description | Key features |
| ------------------------------- | ------------------------------ | ---------------------------------------------------------------------- |
| Microsoft Defender for Endpoint | Microsoft Defender integration | Endpoint detection, response actions, device management |
| Microsoft Sentinel | Microsoft Sentinel integration | Log analysis, custom alerts, threat hunting |
| SentinelOne XDR | SentinelOne XDR integration | Read SentinelOne alerts and respond to SentinelOne endpoints |
| CrowdStrike | CrowdStrike Falcon integration | CrowdStrike detection and response |
| Notifications | Incident notification engine | Email notifications for Microsoft Sentinel incidents based on severity |
### Configuring modules
Click the workspace card to open its settings page
Navigate to the module you want to configure
Enable or disable features, set thresholds, configure options
Click **Consent** to authorize required permissions for the module
Apply the configuration
### Module-specific settings
Basic workspace settings:
* Workspace name
* Alias name
* Domain
* Points of contact
* Email address
* Subscription ID
* Subscription type
Enable or disable ContraForce modules:
* Microsoft Sentinel (Detection + Response)
Prerequisites to manage this module:
* Microsoft Entra Role: Global Administrator (required to grant the module Consent)
* ContraForce Workspace Role: Owner
* Microsoft Subscription Permission: Owner
You can access the Content Management System for Microsoft Sentinel by clicking the icon in the Microsoft Sentinel module.
* Microsoft Defender for Endpoint (Detection + Response)
Prerequisites to manage this module:
* Microsoft Entra Role: Global Administrator (required to grant the module Consent)
* ContraForce Workspace Role: Owner
* SentinelOne XDR (Detection + Response)
Prerequisites to manage this module:
* ContraForce Workspace Role: Owner
* Gamebooks for Defender XDR (Response for endpoints)
* Gamebooks for Identity (Response for users)
* Gamebooks for Microsoft 365 (Response for emails)
* Gamebooks for Azure (Response for Azure NSG)
* Gamebooks for SentinelOne (Response for endpoints)
Group Management. Workspace Roles:
* Owner
* Content Admin
* Incident Responder
* Incident Analyst
Use Role Management. User Roles:
* Owner
* Content Admin
* Incident Responder
* Incident Analyst
Notification Settings:
Prerequisites to manage this module:
* ContraForce Workspace Role: Owner
* Sentinel Module Configured
Microsoft Sentinel Notifications Settings Based on Severity:
* High
* Medium
* Low
* Info
***
## Permission Consent
Some features require explicit consent to Microsoft enterprise applications.
### Why consent is required
ContraForce uses Microsoft Graph API and other APIs to:
* Read security alerts and incidents
* Execute response actions (isolate devices, disable users)
* Access log data for analysis
These permissions must be granted by a tenant administrator.
### Granting consent
Click the workspace card to open its settings page
Find the module that needs consent
A Microsoft authentication window opens
Sign in with a **Global Administrator** account. ContraForce uses app-only Microsoft Graph permissions, so Cloud App Admin or Application Admin cannot grant this consent
Review the requested permissions and click **Accept**
Consent requires **Global Administrator** privileges in the customer's Microsoft tenant. Work with your customer's IT team if you don't have Global Administrator access.
Complete guide to platform users, groups, permissions, and modules
***
## Best Practices
Name workspaces consistently (for example, "CustomerName: Primary") so they're easy to identify in search and filters.
Create pre-onboarded workspaces before onboarding calls so the customer admin can complete their onboarding immediately.
Periodically click the **Need attention** rollup card to surface workspaces missing a detection module or Agent Center.
Token expirations or policy changes can affect access. Open a workspace's Modules tab to confirm everything still shows **Connected**.
Keep records of which modules and settings are enabled for each customer for support and renewal conversations.
***
## Troubleshooting
### Common Issues
| Issue | Possible cause | Solution |
| ------------------------------------------------ | ----------------------------------------- | -------------------------------------------------------------------------- |
| Workspace shows no data | Consent not completed | Re-run consent flow with admin credentials |
| Module won't enable | Missing permissions | Verify required permissions are granted |
| Pre-onboarded card never moves to Workspaces tab | Customer admin hasn't finished onboarding | Resend the invite or contact the POC |
| Configuration won't save | Validation error | Check for required fields or invalid values |
| Status light is amber | Detection module or Agent Center missing | Open the workspace card and complete the missing module or deploy an agent |
If you encounter persistent issues with workspace configuration, contact [support@contraforce.com](mailto:support@contraforce.com) with the workspace name and error details.
***
## Related Guides
Granting access, Agent Center, connecting your own sources
What customer admins see after the invite email
Post-go-live verification runbook
Managing multiple workspaces
***
Questions about the Workspace Center? Contact us at [support@contraforce.com](mailto:support@contraforce.com).