

Create a repository
Requires the Manage content permission (Content Admin or Org Admin).1
Open the Content Management Center
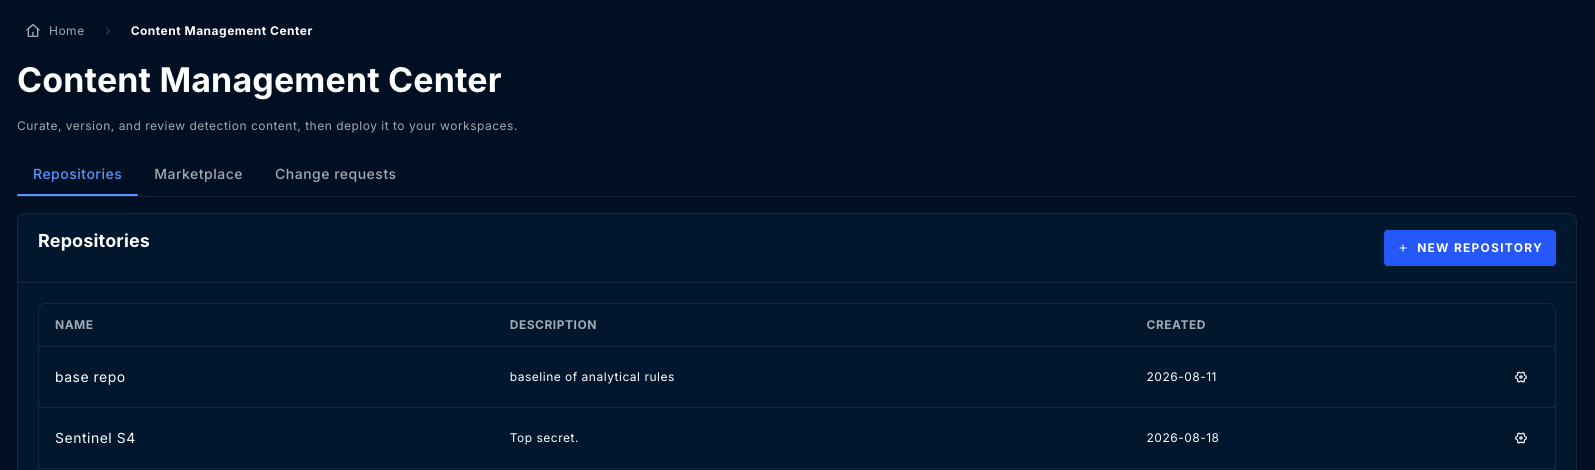
Select Content Management in the left navigation (the Content Management Center) and stay on the Repositories tab.
2
Select New repository
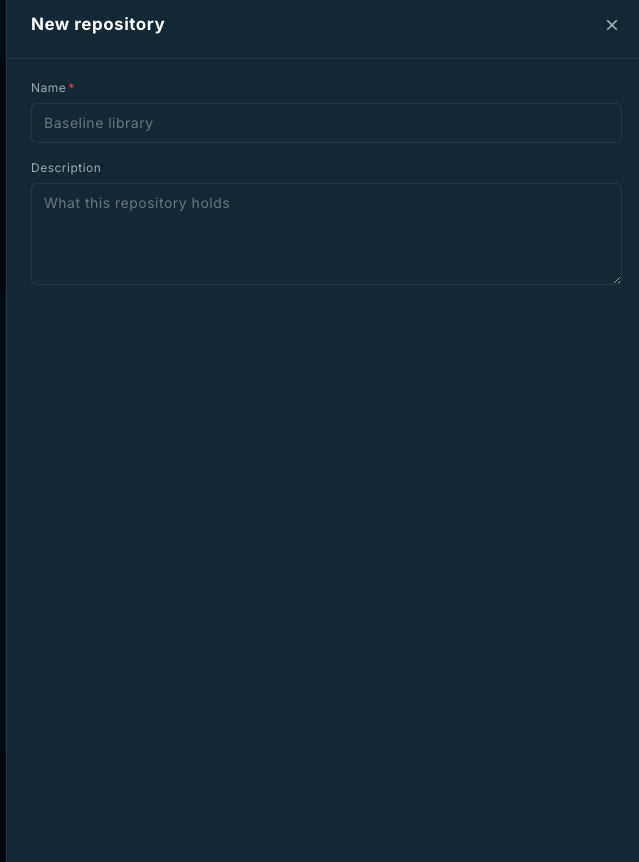
Give it a Name and an optional Description. That is all the dialog asks for, and
both are editable later.
3
Add rules
A new repository is empty. Import,
pull from the marketplace, or author rules.
4
Configure it
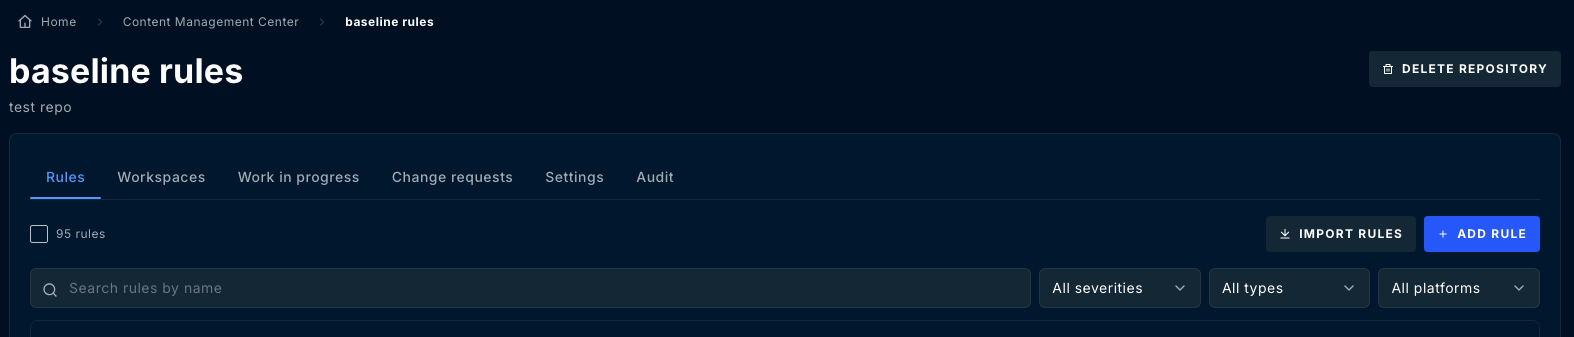
Covered workspaces and baseline protection are set after creation, from the
repository’s tabs. Populate the repository first, then turn protection on before other
people start editing.
Inside a repository
Covered workspaces
A repository only deploys to workspaces you have added to it. This is deliberate: it stops a rule intended for one customer reaching every workspace you manage. Set this under Settings, or from the Workspaces tab. Only workspaces your organization manages are eligible.Removing a workspace from a repository does not remove rules already deployed there. It
stops future deployments and stops the workspace being scanned for drift. Remove the
deployed rules first if you want them gone.
Baseline protection
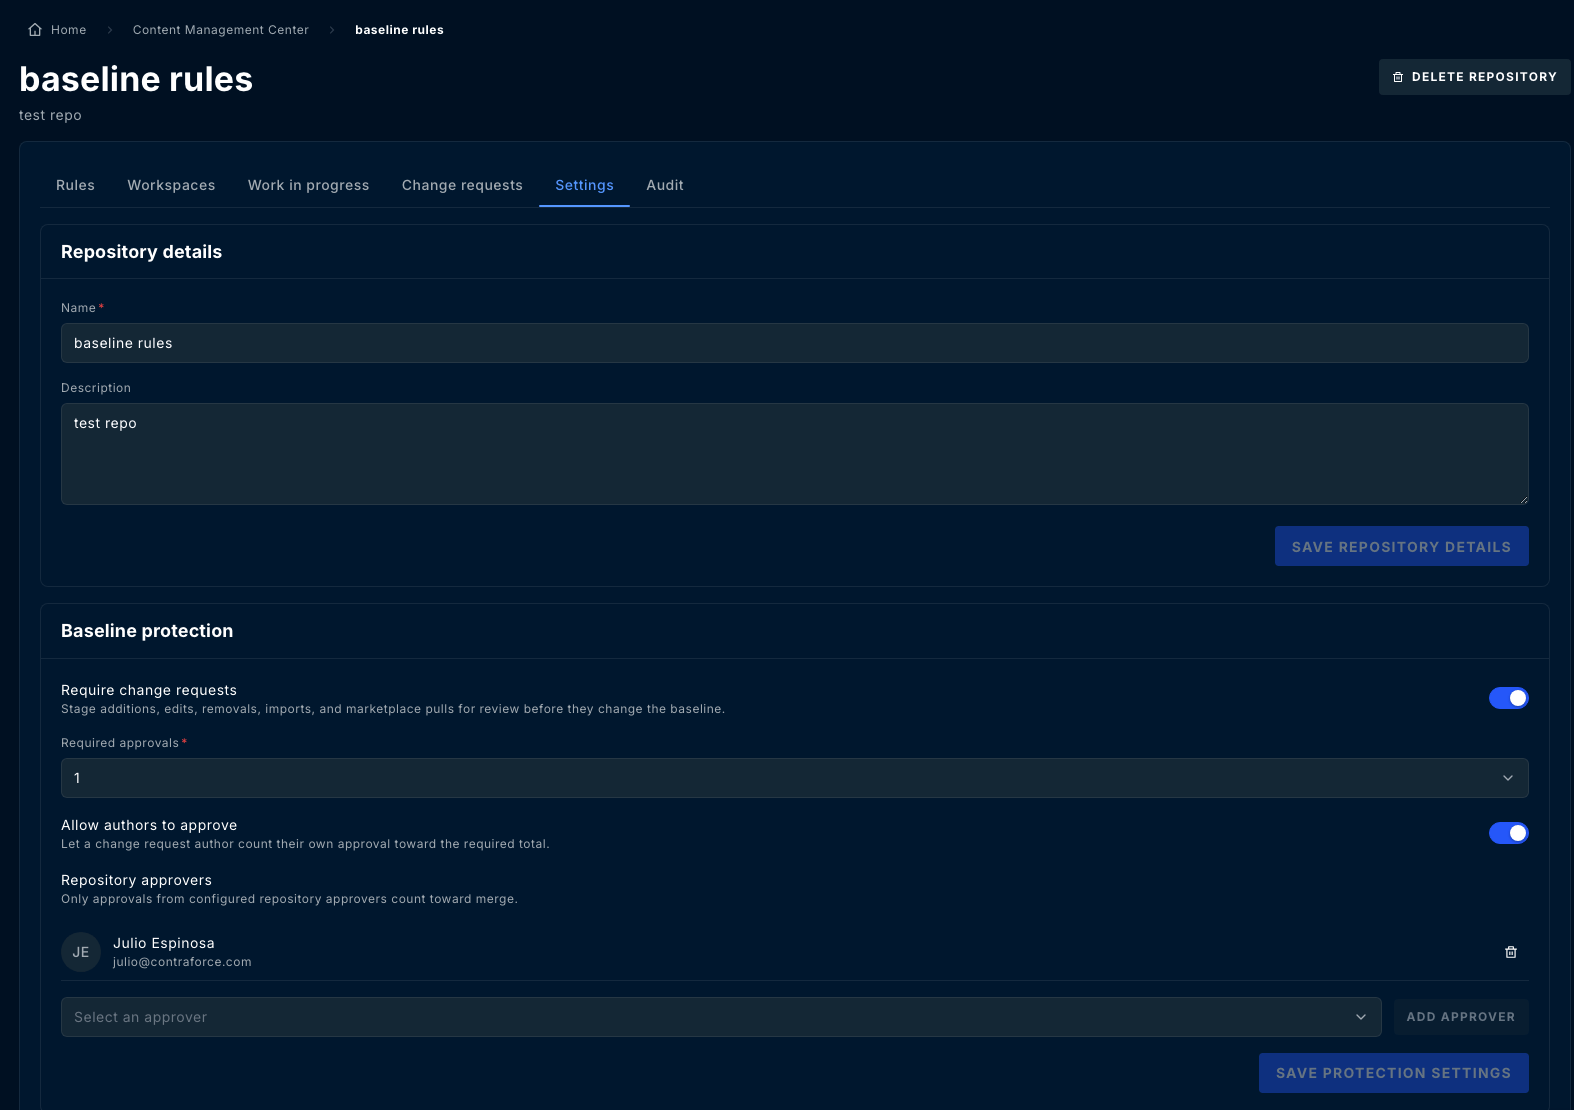
The repository’s rule set is its baseline. Baseline protection is what turns a repository from a shared folder into a reviewed one, and it is configured under Settings. With Require change requests off, an edit changes the baseline immediately. With it on, additions, edits, removals, imports and marketplace pulls are all staged for review instead: each becomes a work-in-progress item, which must be added to a change request and approved before it changes the baseline.Protection settings
While protection is on, a single change request is capped at a fixed number of items. If you
are migrating a large rule set, do it before you turn protection on, or split it across
several change requests.
Sentinel settings
A repository can carry a default target workspace for Microsoft Sentinel. When a deployment does not name a workspace explicitly, this is where it goes. Set it under Settings if most of the repository’s content is destined for one workspace. Leave it unset to be asked every time.Audit
The Audit tab records every action against the repository: rules created, imported, edited, deployed and rolled back; change requests opened, approved and merged; settings changed. Each entry names the actor and the time. This is a read-only record and cannot be edited or cleared.Deleting a repository
Requires the Manage permission.Related Guides
Rules
Import, author, version, deploy, and roll back the rules in a repository.
Change requests
Review, approve, and merge changes in a protected repository.
Workspace coverage and drift
See what each covered workspace is running and resolve drift.
Sentinel and Defender
How Sentinel analytics rules and Defender XDR custom detections are imported and deployed.
Questions? Contact us at support@contraforce.com.